| Home | Products | Services | Resources | Our Guarantee | About Us |
Packages are too inflexible and don't provide competitive differentiation, but custom-built solutions are too slow [to develop] and costly. System integrators are starting to offer next-generation pre-built solutions. - Gartner Research
Did you know?
xSynthesis Search includes features often found only in enterprise search packages, at the cost and ease of use of entry-level search engines. Use it for your publicly accessible e-commerce, membership, or marketing web site, your protected members-only content, or your intranet.

For more articles by our contributors, see:

I recommend the following hardware/ computer parts vendors:
- Micro-Center
Retail store with excellent selections and prices. Check their store locations to see if there is one nearby you. - NewEgg.com
New vendor with excellent customer service, easy returns if needed, easy to use and find items web site. - TigerDirect.com
Great selections and prices. - CyberGuys.com
Best place for parts and accessories, such as cables, brackets, plugs, etc.
You may find the following helpful as reference materials.
- PassMark's CPU
Benchmark charts
Get reference idea of how your CPU compares with others. - PassMark's
Videocard Benchmark charts
Get a reference idea of how your videocard compares with others. -
PassMark's PerformanceTest, test your own PC
Free 30 day trial, or buy it for $24 and test as many PCs as you need. - Intel's Microprocessor Reference Guide
- BenchmarkReviews.com
- Tom's Hardware, Performance Charts section. Particularly helpful is the hard drives testing area.
- Intel Processor Identification Utility
- CPUID - x86 CPU, motherboard, memory, system details.
Building Business Class Desktop On a Budget (UNDER $300)
by Zoran Zaev, 2009-01 (January)
While few years ago, it may have cost $1,000 to $1,500 and more to purchase or build a basic business class desktop computer, prices have fallen greatly in the last 5-6 years, so that it is possible to obtain all the parts that you need and put one together for as low as ~$200-$300, plus your monitor!
 The
following components were purchased from few vendors:
Micro-Center
(or see their
monthly specials),
NewEgg.com, and
TigerDirect.com. Prices may vary
now, as specials come and go, but still the price ranges ought
to be similar and with time even lower. You can always customize
to your own needs, by adding features and parts where your
special needs require and taking away from areas that are not
necessary for you. I still hope that this will show you how easy it
is to put together a business class desktop, whether for your
own business needs at work, or for your home as a great weekend
project, without breaking your budget.
The
following components were purchased from few vendors:
Micro-Center
(or see their
monthly specials),
NewEgg.com, and
TigerDirect.com. Prices may vary
now, as specials come and go, but still the price ranges ought
to be similar and with time even lower. You can always customize
to your own needs, by adding features and parts where your
special needs require and taking away from areas that are not
necessary for you. I still hope that this will show you how easy it
is to put together a business class desktop, whether for your
own business needs at work, or for your home as a great weekend
project, without breaking your budget.
Note: if the links don't work anymore, simply go to the particular store's web site and search for similar products by keyword or component type & brand. Products model numbers come and go often and change frequently.
The essentials:
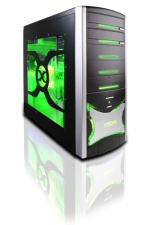
- Case ($48): Xion Solaris ATX Computer Case with
450W Power Supply
(from Micro-Center)
Manufacturer web site and specs. This case is well built, simple to put together, looks nice (see picture to the right) and it is light. - Motherboard ($55):
Biostar G31-M7 TE 775 mATX (MBs @
Micro-Center or
specific item,
TigerDirect or
even for $10 extra you could get built-in 1Gb NIC and
DVI)
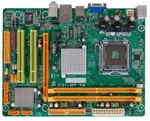 This Biostar motherboard with built-in G31 (Intel 3100 video
chipset/ Intel(R) G31 Express Chipset for North Bridge) video card that has quite fine performance with up
to 256MB of shared video memory, Intel(R) ICH7 for South
Bridge, 4 SATA ports, 5.1 channel
surround sound, 10/100 network card, 1 IDE port for up
to 2 drives, 2 DIMM memory slots for up to 4 GB of RAM (Win
XP 32-bit edition cannot even use that much, only little
over 3 GB, which is still plenty), 1 VGA port, 4 USB, 1 PS/2
keyboard, 1 PS/2 mouse, etc. Biostar motherboards are one of
the easiest to setup and put together. See
manufacturer's web site (Biostar).
This Biostar motherboard with built-in G31 (Intel 3100 video
chipset/ Intel(R) G31 Express Chipset for North Bridge) video card that has quite fine performance with up
to 256MB of shared video memory, Intel(R) ICH7 for South
Bridge, 4 SATA ports, 5.1 channel
surround sound, 10/100 network card, 1 IDE port for up
to 2 drives, 2 DIMM memory slots for up to 4 GB of RAM (Win
XP 32-bit edition cannot even use that much, only little
over 3 GB, which is still plenty), 1 VGA port, 4 USB, 1 PS/2
keyboard, 1 PS/2 mouse, etc. Biostar motherboards are one of
the easiest to setup and put together. See
manufacturer's web site (Biostar). - CPU ($70): Intel Core 2 Duo E4500 (CPUs @
Micro-Center,
CPUs @ TigerDirect,
CPUs @ NewEgg)
Comes with a heat sink. However, you will need some grease such as the Arctic Silver Arctic Alumina Premium Ceramic Thermal Compound 1.75 gram Tube, $3 (Micro-Center). For more tools & downloads and other links specific to the Intel Core 2 Duo family of processors, you can see Intel page. - Memory ($55 - $30 rebate = $25): Corsair XMS2-6400 4GB DDR2-800 (Memory @ Micro-Center or specific item)
- Hard Drive (HDD) ($48): Western Digital Caviar SE WD2500AAJS 250GB 7200 RPM 8MB Cache SATA 3.0Gb/s.
- DVD ($20): IPSG PI0 18X DVD +/- RW, with Dual/Double layer support SATA (DVDs @ Micro-Center)
- Speakers ($8): Inland PS Bundle Black, (Micro-Center)
- Keyboard ($15): Rosewill RK-7310 Black 104 Normal Keys 7 Function Keys USB Super Slim Multimedia Keyboard (NewEgg). Great Scissor-Key structure, just like what is found in laptops.
- Mouse ($10): Standard Microsoft Optical Mouse (ex. NewEgg)

Total: $299.
Since I already had a hard drive from my old computer, plus keyboard/ mouse and speakers, I paid only $226!
Optional items:
I had considered these optional items. However, in your case
you may select optional items that would be more beneficial to
you.
- Backup/ UPS ($45): APC Backup UPS 200W, at Micro-Center, but $40 at Wal-Mart! (you local office supply or supermarket stores may have good deals on these too, as they are heavy for shipping).
- Mouse/ Pointing Device: I didn't include a mouse,
so you may pick one up, if you don't have one already! Since
you saved a lot on the whole computer, now you may be able
to buy the mouse you always wanted! Here are couple of
suggestions:
- Ergonomic Mouse ($50): Microsoft 72Q-00002S Silver 5 Buttons
Tilt Wheel USB Wireless Laser Natural Mouse 6000, (NewEgg)
If you hand suffers from holding a regular mouse for too long, this is a great alternative. It takes a bit to get used to it (few days) and using a wireless mouse is not ideal as the mouse is heavier due to its batteries, over a wired mouse. But, it is works fine and it will help your wrist rest from a regular mouse. I alternate between this one and regular wired mouse. - Tablet ($63): Bamboo (Small)
Pen Tablet with Pen Only (Amazon)
Great for drawing, but also just using instead of a mouse. Feels like holding a pen.
- Ergonomic Mouse ($50): Microsoft 72Q-00002S Silver 5 Buttons
Tilt Wheel USB Wireless Laser Natural Mouse 6000, (NewEgg)
- Operating System ($100): you can use Linux for free, keep your old PC OS (for ex. Windows XP, which runs fine and even better than Vista!), or buy and OEM copy of Windows Vista Home Premium for (NewEgg).
Extras Total: $253 (assuming you will buy both the tablet and the tilt mouse). Of course, depending on your needs, you may decide not to go for the type of extras that I found beneficial, but go for better surround sound speakers (ex. 2+1 speaker set by Altec Lansing for $30 at Micro-Center or these 5+1 speakers by Inland at Micro-Center for $30 also) or some other peripheral component. Together with the extras given here, the total comes to $552.
My total cost in Jan, 2009 was $188.
I think it will be very unlikely to find such a powerful system at such an affordable price, with such great extras!
Note: all prices were given with taxes and/ or shipping & handling.
Assembly
Assembly is very straight-forward. Follow these basic steps:
- Open the motherboard and follow the CPU installation instructions (included in the CPU box) to position the CPU into the motherboard. Intel CPUs have simple few step instructions of how you can do this. For more details (perhaps too detailed instructions) you can see Intel's web site at: ATX Installation Instructions for Boxed Intel(R) Desktop Processors in the 775-Land Package.
- After the CPU is securely positioned and fastened, apply the thermal grease properly (not too much of it, follow these instructions from Arctic Silver grease manufacturer). The thermal grease ought to be done in a simple one line from left to right (when looking on top of a CPU which has the corner dot/ clipped corner in the bottom left of your view). If you have to remove old thermal grease, as I had to do, just use some Q-tips and rubbing alcohol.
- Mount the heatsink on top of the CPU according to its instructions, making sure that the legs/ clips go all the way in and clip fully. The fit has to be done well, so that there will be no overheating of the CPU. It may seem that the heatsink will bend the motherboard or even break it. While, we have to be careful to not crack or break the motherboard, a slight twist of the motherboard is possible to occur and that is fine. I had initially not assured that the heatsink is tight on top of the CPU and I had an overheating CPU for a brief time - I fixed it by simply clipping the heatsink on all sides fully.
- Overheating tips: it is good to monitor your CPU
temperature, especially when under load (this can be
simulated with software). This can test how well you have
installed the CPU heatsink and thermal grease. Web sites
that are dedicated at the hobby of over-clocking your PC
(not recommended, as it can lead to crashes and other side
effects if not done properly), have a tool from Intel called
Intel Thermal Analysis Tool (TAT), but Intel does not make
it available on their web site anymore. Another tool that works on
AMD and Intel CPUs is
Core Temp
(reports temperature only, if you want to know how high the
temperature may be at load, use a benchmarking tool and have
it loop in its CPU test, ex. such as
3DMark05, Free Edition). Also, your motherboard software
may already come with utilities that would report the
temperature of the CPU. Another tool that can generate CPU
stress and report its temperature is
CPU Burn In.
A commercial tool exists called
Hot CPU
Tester Pro and it sells for about $20.
CPU temperature for around idle time should be around 30-40 degrees for properly configured systems, and up around 60 degrees for running around 100% time for prolong time. Temperatures above 80 degrees can lead to system damage, especially if kept for longer time and usually indicate improperly mounted heatsink or thermal grease not being applied properly. There is a Core 2 Quad and Duo Temperature Guide at Tom's Hardware, that you may like to review. - Attach the motherboard to the case and attach the case connectors following the motherboard and case installation instructions. The motherboard has additional USB plugs, but the extra connectors don't usually come in the package and would have to be purchased separately. If you like to do this, you can check CyberGuys.com.
- Connect the memory by firmly pressing the memory blocks, assuring the the gap matches correctly, connect hard drives with the Sata cables (assure that you have good Sata cables, old or broken Sata cables can lead to some intermittent problems), connect the DVD drive, in the same way as the hard drives, just make sure they are in the Sata #2 or later position in the motherboard (the Sata numbers are marked on the motherboard). Connect any extra cards that you may have and power up the computer. The first thing you notice is the motherboard test and showing you the memory information, hard drives being detected, etc.
- If needed, you can enter into the Bios (usually F2, F12, or DEL at boot up), to edit certain features of the system, such as boot order (best to have CD/DVD drive first, then the primary hard drive), enabling/ disabling features (for example, if you don't have a floppy drive you can disable that feature;). Just follow your motherboard manual as a simply guide for this purpose (included with motherboard or you can use the link above).
- Install your operating system of choice. I installed Windows XP Professional. Just hit SPACE bar at boot-up (the screen usually tells you that briefly) to boot from CD/DVD and follow the instructions that Windows gives you. After Windows has installed, you will need to install the various motherboard related drives (ex. for the built in video card, sound card, chipset drives, etc) - you do this but running the setup program on the included BioStar disk.
- You can optionally run Windows XP 64 bit edition to gain the benefits of 4GB or more RAM. This will tend to run faster and 32-bit applications are run within the WOW64 subsystem. Certain tests with PassMark PerformanceTest showed certain operations being much faster with XP-64 bit edition, such as: CPU integer math 164% faster, CPU floating point math 29% faster, CPU image rotation 166% faster, Memory large RAM over 100% faster, with overall CPU improvements of 23%, overall memory improvement of 10%, overall graphics improvement of 16%, but overall disk performance was down 15% (this may be due to the performance testing program optimization, or application optimization being primarily for 32-bit apps, further research ought to be done). The overall system performance up 16%.
Performance
This system is way more than enough for a regular desktop user, who utilizes Office applications, web browsing, email, and similar applications, even if this is a power user, keeping many windows open at the same time. System performance is primarily a function of the speed of the Hard Drive, Video Card, and CPU (assuming sufficient memory, which in our case is more than enough). In our performance overview we use PassMark figures (CPU, Video), or Tom's Hardware Hard-Drive Workstation I/O Test. Compare our system with some other reference systems (for the higher performing ones, consider the cost and see if the cost/ benefit ratio would be beneficial to you).
| CPU (PassMark's CPU List) |
Video (PassMark's Videocard Benchmark, G3D rating) | Hard Drive
() |
| E4500 = 1163 (ours) | Intel G33/31 = 137 (ours) | WD Caviar SE 250GB = 720 (ours) |
| AMD Turion 64 X2 M TL-56 = 682 | GeForce 7000M/ 610M = 48 | |
| Intel Pentium 4 2.4GHz = 411 | Matrox Millennium G450 = 41 | Samsung SpinPoint F1, 1TB = 673 |
| Intel Celeron 2.4GHz = 298 | Intel 82865G (integrated) = 56 | Hitachi T7K500, 500GB, 8MB = 554 |
| Intel Core 2 Quad Q6600=2708 /$130 | Intel G43 = 214/ $90 motherboard | |
| Intel i7 920 = 6248 /$250 | GeForce 9560GT = 360/ $70 | WD Raptor 150GB = 1050 / $180 |
Conclusion
Overall easy setup and installation, with great performance that takes care of all standard office and even expert user needs.
Want to know more?
today and let us know how we can make this section better.
| Home | Products | Services | Resources | Our Guarantee | About Us | Contact Us |
Copyright © xSynthesis 2001-2013. All Rights Reserved. Terms of Use and Privacy Policy.
484 Williamsport Pike #126, Martinsburg, WV 25404.
![]()
Page name: hw_business_desktop_on_budget.aspx
Path: /en/resources/hw_business_desktop_on_budget.aspx